Fly! 172 painting 101
So you want to try painting the 172 in Fly!, I thought I'd try it
and made these test texture tiles to see where stuff goes.
Here is a page for the Hawker.
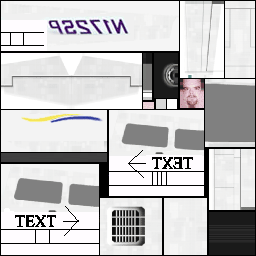
Here are the test tiles:
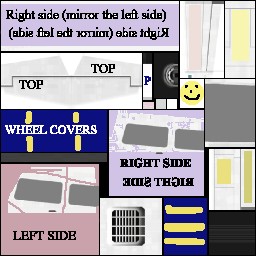

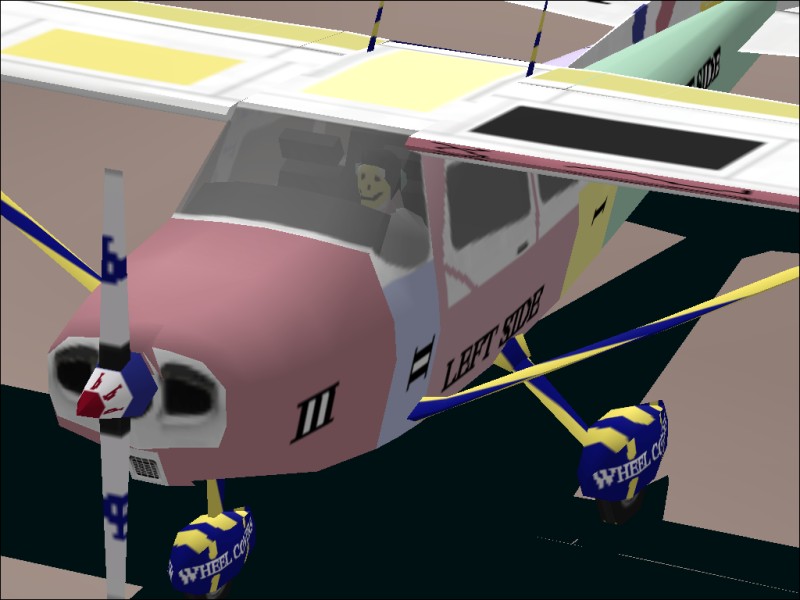
The flaps, tail, rudder, and others are for the left
side and mirrored to the right.
Wing surfaces are for the top and are mirrored for use
on the bottom.
Notice how all the struts and inside wheel covers use
the texture block next to the engine air intake.
The leading edge of the left wing uses the 2 blocks
below the tail and rudder areas, for the right wing the leading edge is
included in the wing areas.
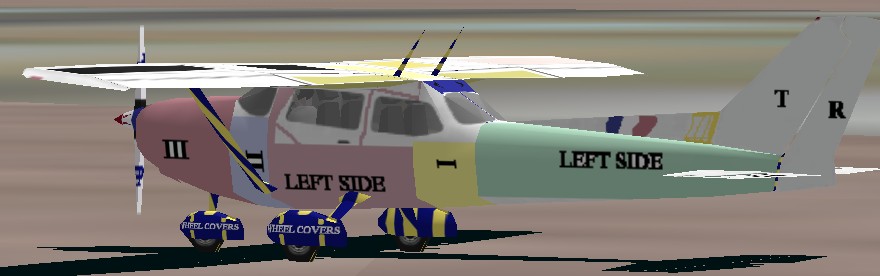
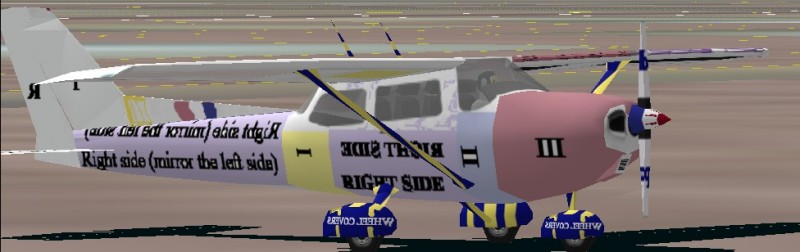
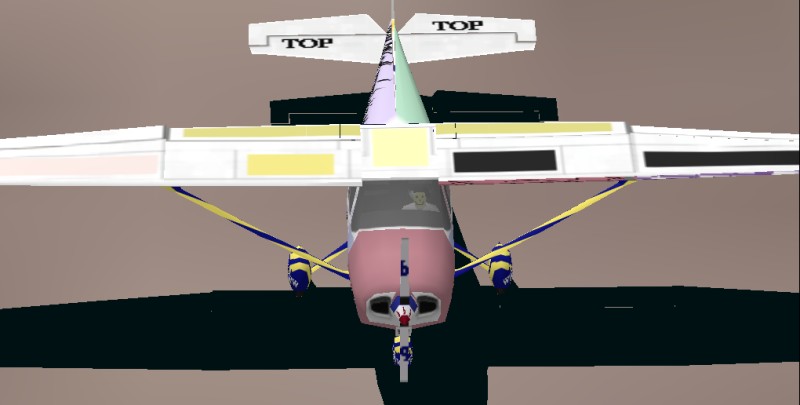
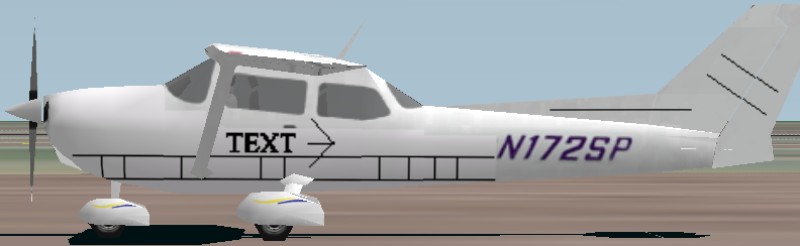
Here is what the 172 looks like with them:
Here are test alignment tiles:
I used Mike Hare's 172sp tiles as a base
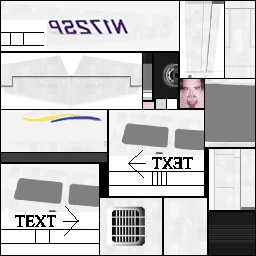
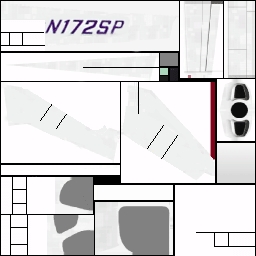
test1.bmp
test2.bmp
Right click on these to save them.
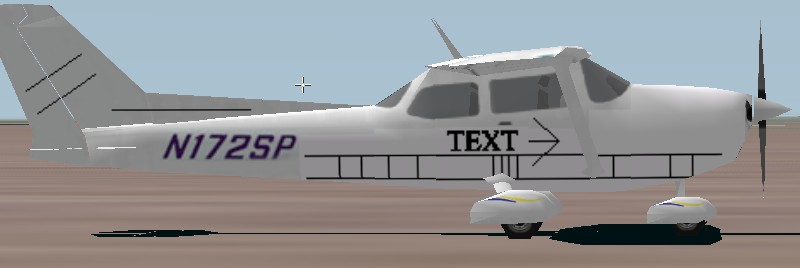
Here's what the 172 looks like with them:
To use these textures you can use the raw2bmp converter available in
the avsim.com Fly! file library. The textures go into the art folder in
the fly! main folder. To repaint the default skyhawk use the file names
skyh1.bmp and skyh2.bmp. When you convert you will have 4 files:
skyh1.raw, skyh1.act, skyh2.raw, and skyh2.act. I found if you load the
.raw files as 256x256 pixel greyscale images into a graphics editor you
can spot obvious single pixel color errors easier than looking at the bmp
files.
Back to the index.
Marty Schultz
9/11/99
Disclaimer